I decided to separate out this recipe, as it is one of those things that I can refer to from other recipes and to be honest is an undertaking in itself! Puff pastry is one of those things I never thought I would be able to have the technical ability to pull off. However, recently I had the chance to give it a go when I came to make mille feuilles and it had a favourable ending.
Don’t expect to use the pastry straight after you’ve made it, as the best results come from leaving in the freezer for a couple of days so the layers can form. Also, make sure you follow the process for defrosting gradually as trying to rush it is likely to melt the butter and make the pastry very sticky to work with – trust me I’ve tried!
THE INGREDIENTS
The D’etrempe
- 680g plain flour, plus more for rolling out the dough
- 1/2 teaspoons fine sea salt
- About 300ml double cream, as needed
Note: You can make the recipe substituting the double cream for water if you’re worried about calories, but when you’ve added a over a packet of butter to the mix, I’m wondering why you’d want to do that!
The Beurrage
- 340g unsalted butter, chilled and cut into cubes
- 3 tablespoons plain flour
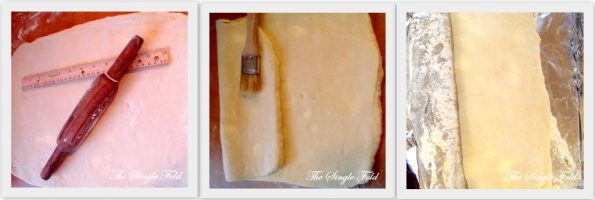
Okay, so there are a series of steps and lots of fancy terms for things because it’s French, you’ve already seen a couple. However, the words are less important that the instructions themselves, so for that reason I’ve included some photos along the way as personally I work better from visuals and practice than trying to work out what the words are trying to tell me. Also, make sure you have a ruler or in some cases I ended up using a measuring tape that I use for DIY.
THE STEPS
STEP 1
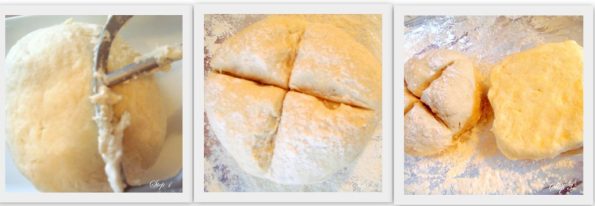
Make the d’etrempe, by combining the flour and salt together using the food processor fitted with a paddle attachment. On low speed, add enough of the cream to make a stiff but a sticky dough. Do not overmix as the dough will be worked on and will absorb more flour during the rolling and folding processes. Transfer dough to a floured work surface. Knead a few times to smooth the surface, and shape into a ball. Put in a bowl and cut an X about 1 inch deep in the top of the ball, then pop in the fridge until after you’ve made the beurrage.
STEP 2
Once you’ve put the ball of dough into the fridge, get started straight away on the beurrage. To do that, beat butter on medium speed until the butter is almost smooth, about 30 seconds should do it. Add the flour and continue beating until the mixture is smooth, cool and malleable, about 30 seconds more. Transfer to a lightly floured surface and press any remaining lumps of butter out with the heel of your hand, and shape into a 4-inch square. Wrap the beurrage in cling film and place in the fridge for a little bit, 15 minutes should be enough. The d’etrempe and the beurrage should be about the same consistency and temperature after this slight chilling.
STEP 3
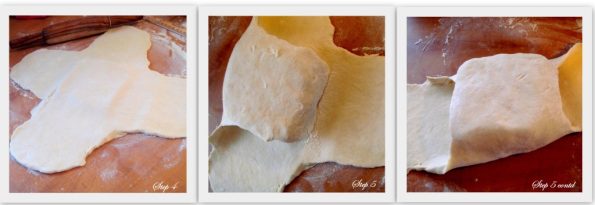
Flour the work surface. You will notice four quadrants of dough between the crosses of the X at the north, south, east and west positions. Dust the top of the dough with flour. Using a heavy rolling pin, flatten and stretch each quadrant out about 2 1/2 inches to make a cloverleaf shape with an area in the center that is thicker than the leaves. Roll each leaf into a flap about 6 inches long and 5 inches wide, leaving a raised square in the centre. Using the side of the rolling pin, press the sides of the raised area to clearly mark the square.
STEP 4
Place the butter square in the center of the clover leaf. Gently stretch and pull the north-facing flap of dough down to cover the top and sides of the butter square, brushing away any excess flour. Brushing away the excess flour is really important, as if the dough takes on too much flour it tends to become dry and brittle to work with. Since the dough is on the stiff side, just cover the butter square as best as you can without tearing the dough. Now stretch and pull the south-facing flap of dough up to cover the top and sides of the butter square. Repeat for the other two flaps, completely covering the butter square and creating a very rich pocket of joy.
STEP 5
Now starts the detailed folding instructions, so take a look at the photos before attempting each fold.
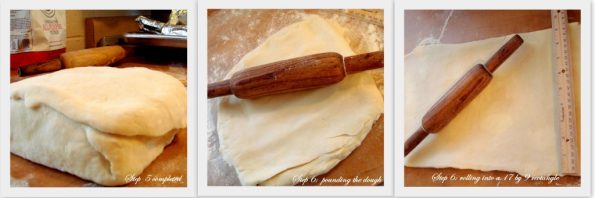
Dust the surface with flour. Turn the dough over so the four folded flaps face down. Be sure that the open seams face you. Dust the top of dough with flour. Using a large rolling pin, slightly pound the top of the dough to widen it slightly. This helps distribute the butter inside the dough. Roll dough into a 17 by 9-inch rectangle. Fold the dough in thirds like a business letter, brushing away excess flour (called a “single fold”). Roll lightly to compress layers and transfer pan to refrigerator for about 20 minutes. The chilling is an important part as every time you work the dough it will warm up and become sticky.
STEP 6
Dust the work surface with flour. Place the dough on the surface with the long seam of dough facing you. Dust the dough with flour. Roll out the dough into a 17 by 9-inch rectangle. Fold the right side of dough over 2 inches to the left. Fold the left side of the dough over to meet the right side. Fold the dough in half vertically from left to right. (called a “double fold”). Roll dough slightly to compress layers. refrigerate for 20 minutes.
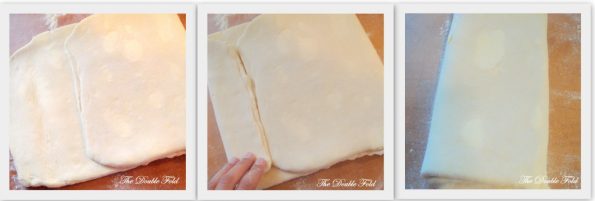
STEP 7
Repeat rolling and folding dough into a second double turn. Refrigerate for 20 minutes.
STEP 8
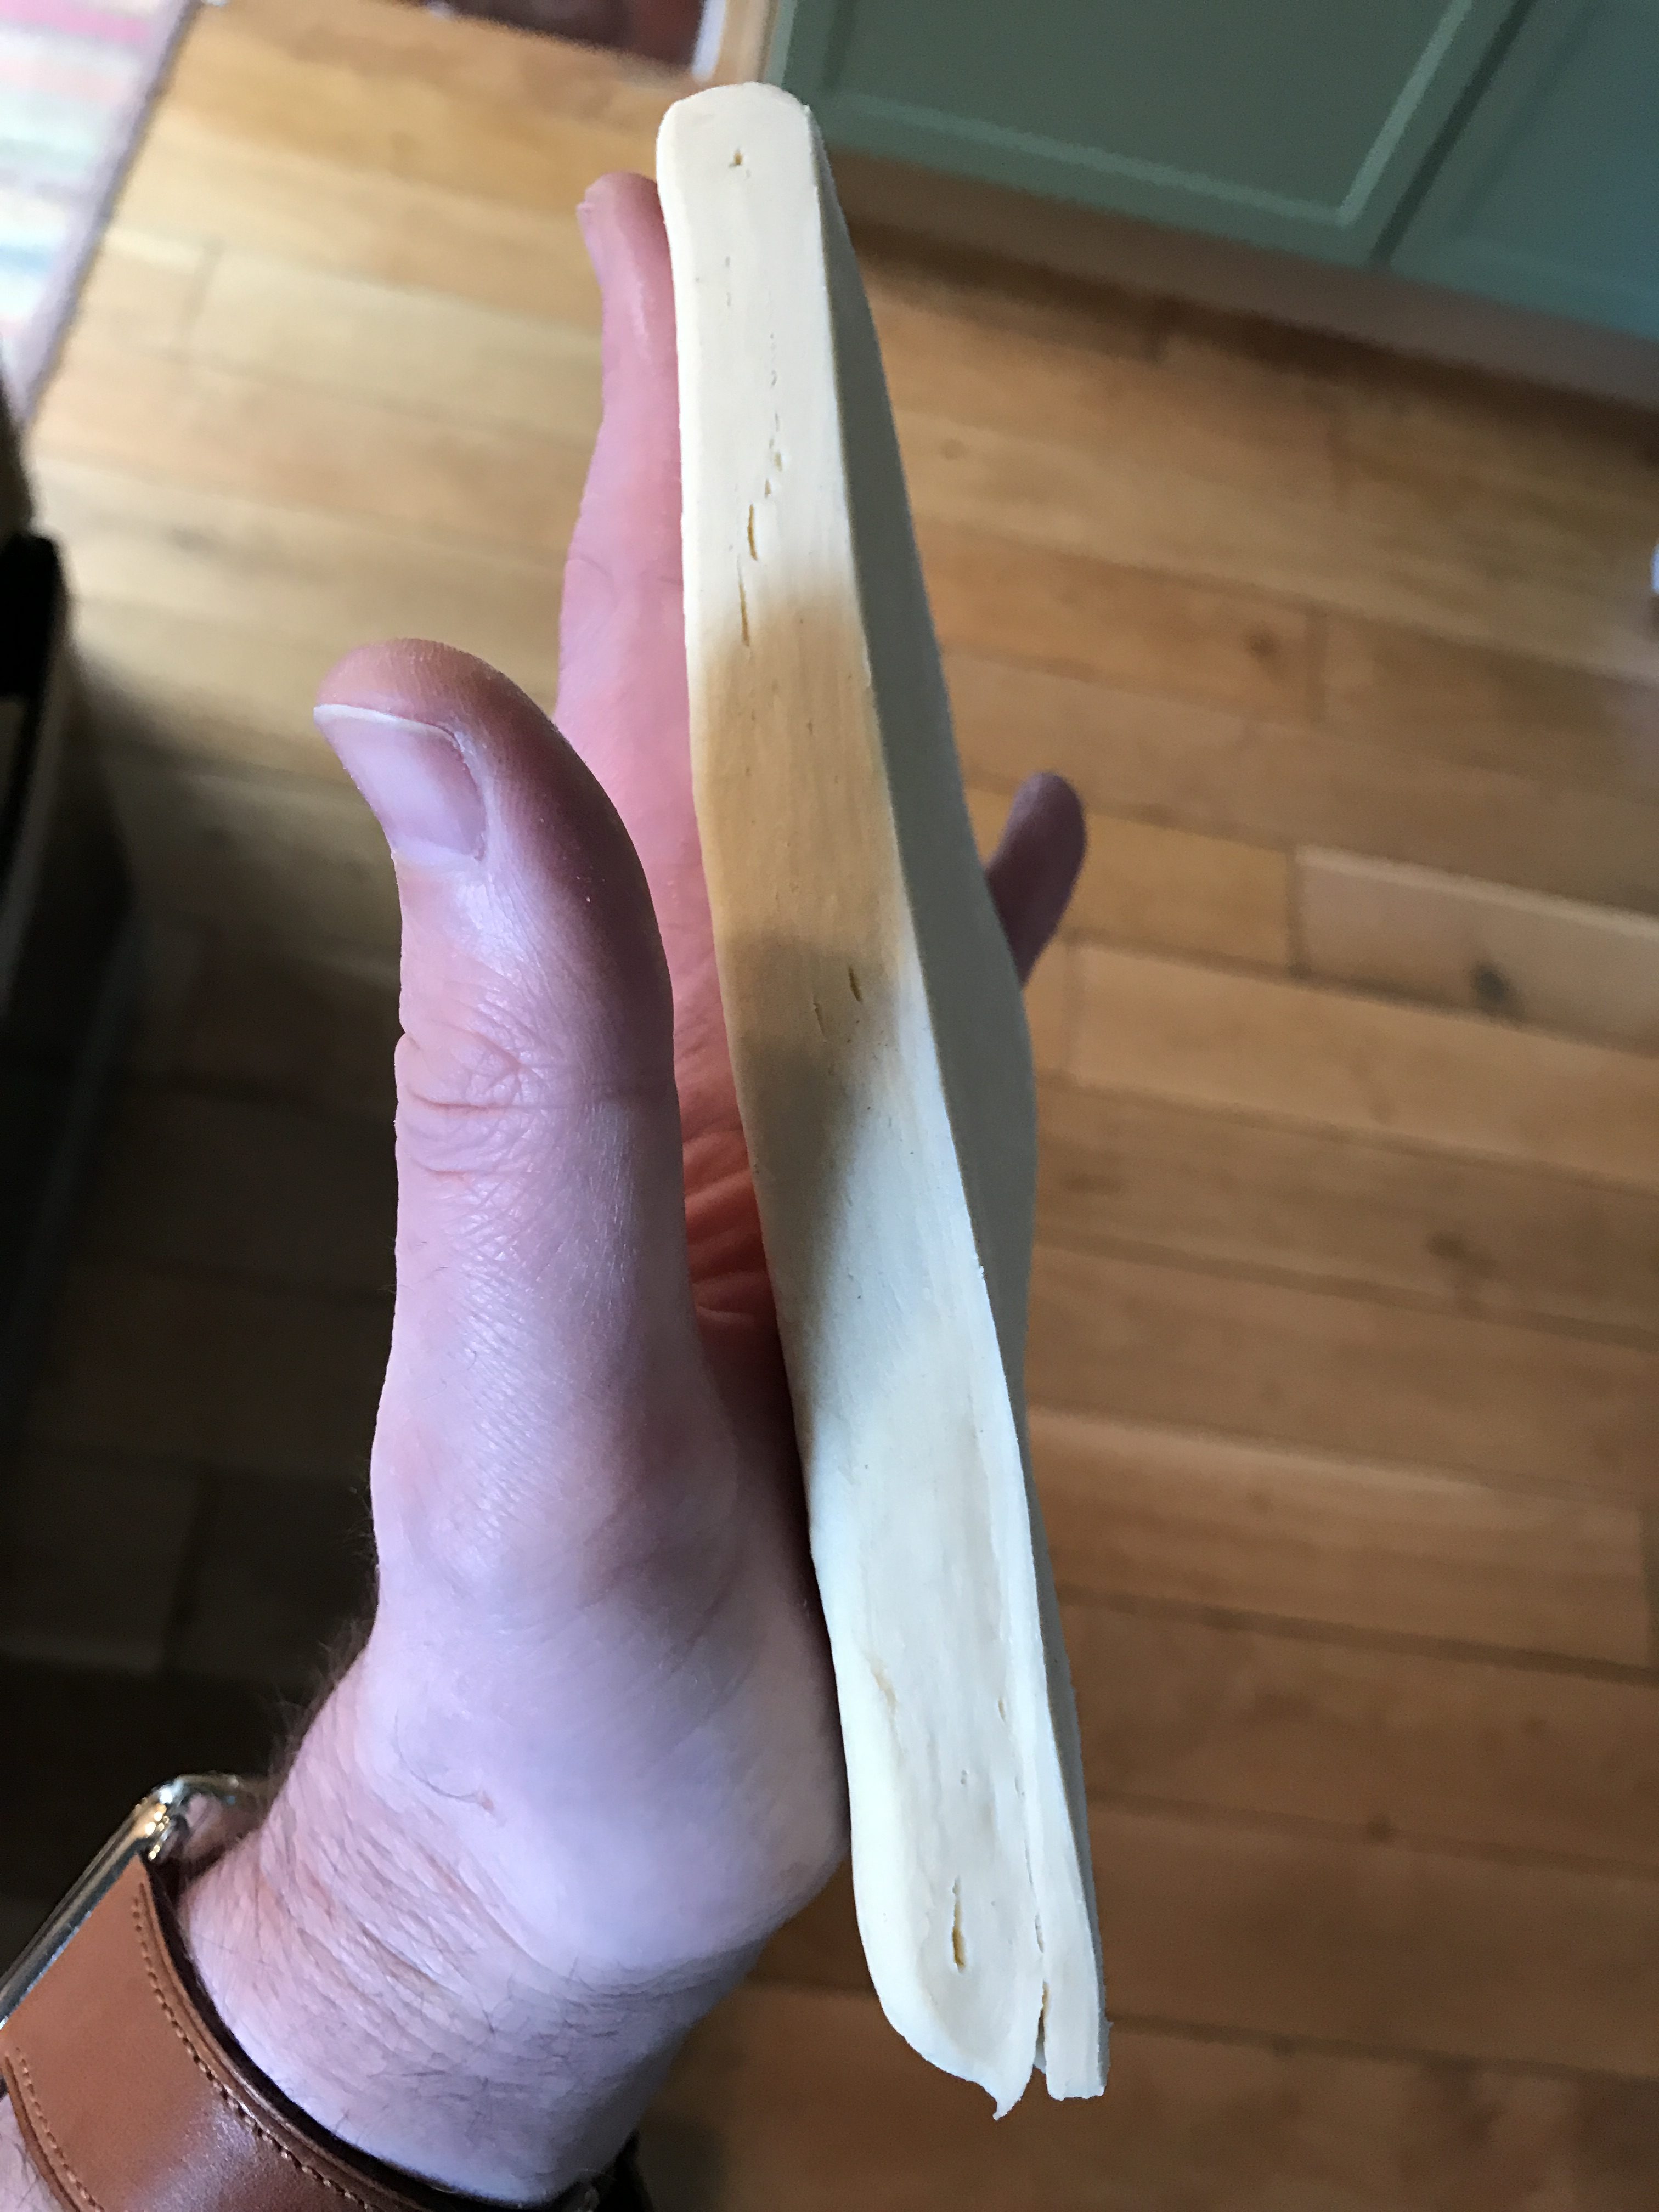
Repeat rolling and folding dough into final single turn. With the long seam facing you cut the dough in half vertically. Wrap each dough tightly in plastic wrap, then wrap again. Freeze for at least 24 hours or up to 3 weeks. As I mentioned before, by freezing the dough, the butter and flour layers firm up, resulting in an extra-flaky texture on baking. It also relaxes the dough better than refrigeration alone.
STEP 9
The night before using the dough, transfer the frozen dough to the refrigerator and let thaw overnight, about 8 hours but no longer than 12 hrs.
1 comment on “Puff pastry – how many steps?!”Add yours →