
I have always marveled at the beauty that is a tear and share cinnamon bun. It is one of Sarah’s ultimate favourites and vanishes quickly with a nice black coffee on a Sunday morning. Like most things of greatness and sublime flavour, I really had no clue how to make it. However, with a stack of cookbooks it wasn’t long before I found inspiration! Who would guess it is another Martha Collinson recipe, her style of cooking really resonates with me and the things I’ve cooked before and want to cook these days.
So, at the heart of most things like brioche, pretzels and the mighty cinnamon bun is enriched dough. Enriched dough is simply dough that’s had oil, butter, eggs or sugar to it. We will start here as it is a recipe that can be reused for other things – might separate it out at some stage as I bake more with it so it’s easier to follow in later recipes.
Ingredients for Enriched Dough
- 75g unsalted butter, cubed
- 200ml whole milk
- 500g strong plain flour
- 7g fast action dried yeast
- 1 tsp salt
- 50g caster sugar
- 2 eggs
Note: Ingredients makes enough dough for one large loaf, or 12 medium sized buns.
The first step of the recipe is to put the butter and milk into a small saucepan.
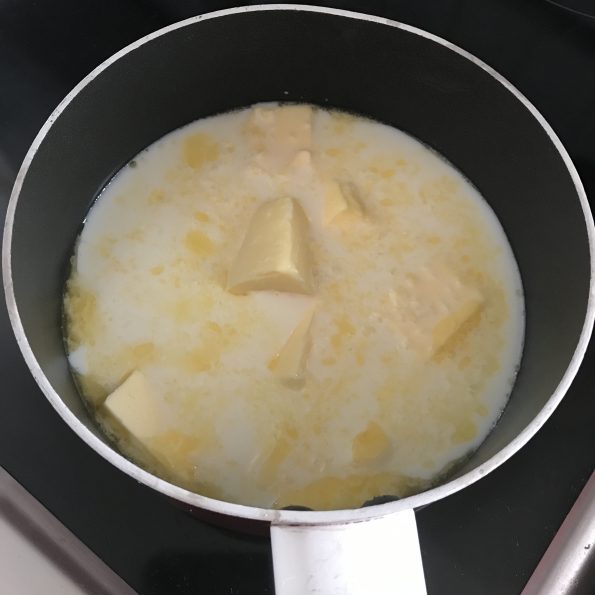
You want to slowly heat the milk and butter until the butter has completely melted, but you don’t want the mixture to boil. You then want to set that mixture to one side to let it cool down before doing anything else with it.
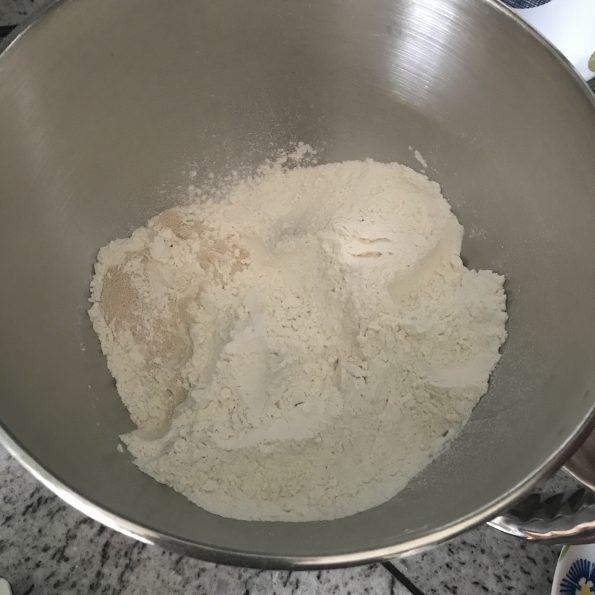
While the mixture is cooling down, pop the flour into a large mixing bowl. Then on opposite sides of the bowl you want to add the salt & sugar and yeast. Maybe not news to you, but it certainly was to me, the reason you want to separate the yeast and salt is because salt apparently can often kill the yeast, which will stop the dough from rising. This was a penny dropping moment for me, particularly as I’ve often mixed the salt and yeast together when adding it to flour and wondered why the dough didn’t rise…
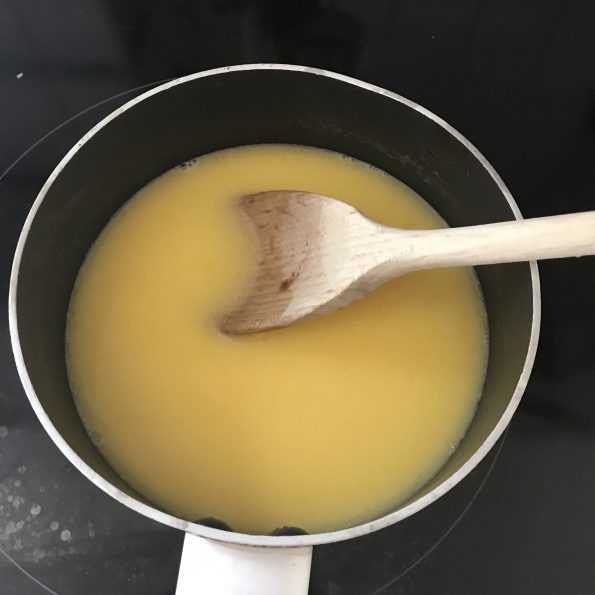
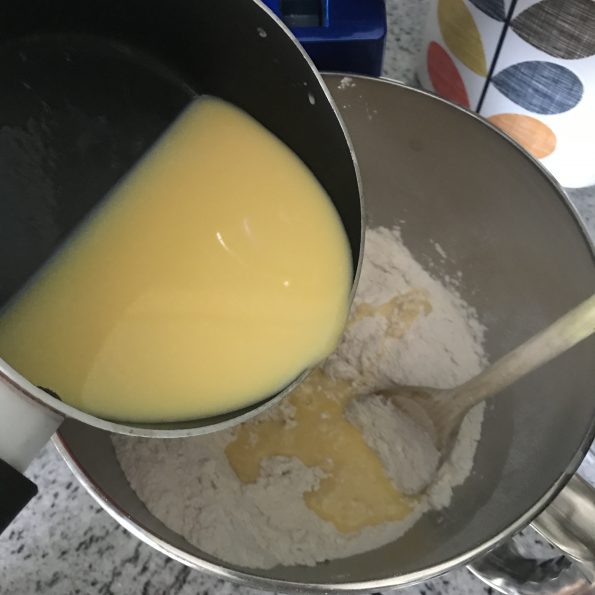
Once the buttery milk has cooled down sufficiently, beat the eggs into the mixture. You then want to slowly add this to the dry ingredients in the bowl, making sure you’re stirring all the time. The end result is a sticky, but not wet mixture.
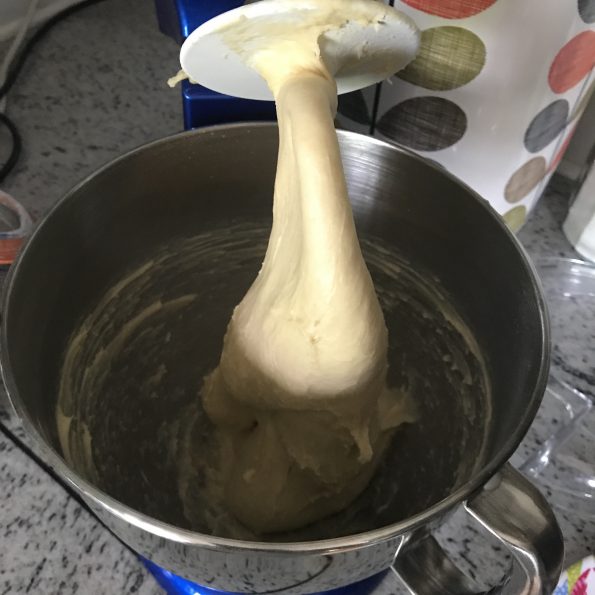
Now the next step you can either turn the mixture out onto a lightly oiled work surface and kneed for 10-15 minutes, or you can do what I prefer and attach the dough hook to the KitchenAid, add a little oil to the bowl and let it go for 5-7 minutes on a medium speed.
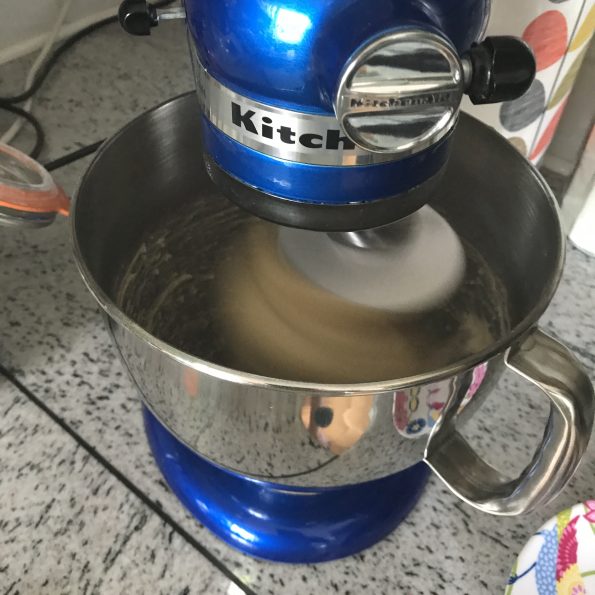
The result is the same (a smooth and elastic dough), but you don’t have to clean up the work surface or have a mini power nap.
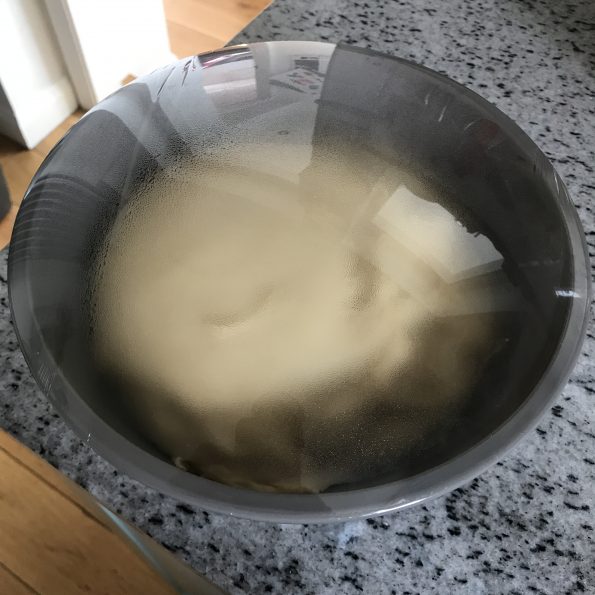
Once done and turned out into a bowl for proving, cover with cling film and leave in a warm place until it has doubled in size (between 1-2 hours). I normally use this time to make something else from the repertoire, or potter round the garden.
Once it is ready, you want to turn it out onto an oiled work surface and knock out any large air bubbles. Now, I would continue using the lazy and clean KitchenAid method, but given the next step is to turn this dough into a cinnamon bun, it’ll be shortly on the oiled work surface anyway. So irrelevant of what the end goal is for the dough, this is where the enriched dough recipe finishes.
Next up is to turn the dough into a cinnamon hero. Here’s what you need…
Ingredients for cinnamon roll goodness WITH a smothering of cream cheese icing
For the rolls
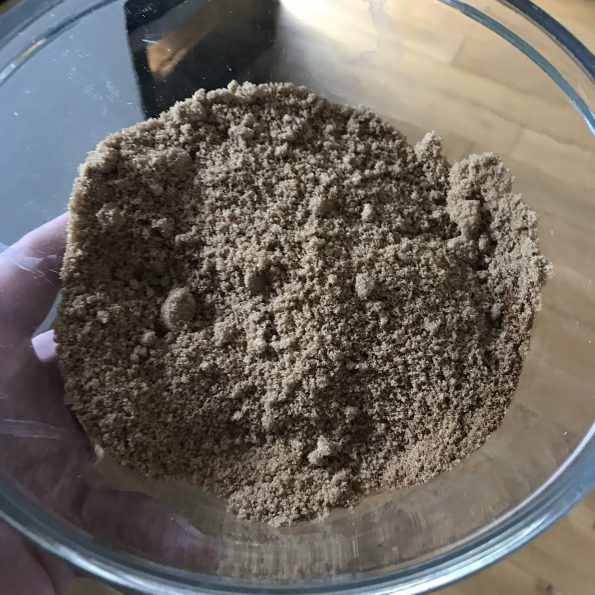
- 200g soft brown sugar – I used light muscavado
- 2 tsp ground cinnamon
- 50g butter, at room temperature with a little bit extra for greasing the cake tin
- 1 beaten egg
For the icing (makes a generous covering)
- 100g full-fat cream cheese (think Philadelphia or an own brand store alternative)
- 50g butter, at room temperature for easy blending
- 300g icing sugar
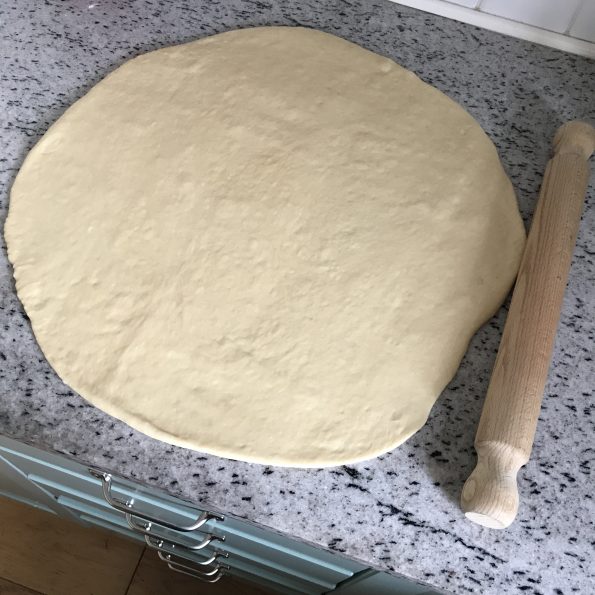
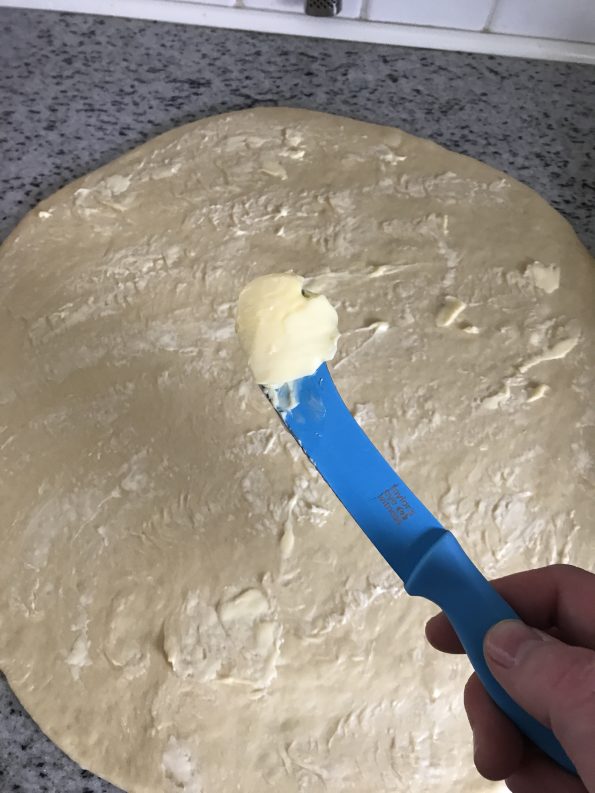
To get the party started you want to roll out the dough you made onto an oiled work surface. What you’re going for is a length of about 40cm as wide as possible, the thinner you make it the more layers you can get packed full of cinnamon yumminess. I always use a tape measure for measuring, which appeals to my exacting nature and also the handyman in me.
You then want to mix the cinnamon and brown sugar together into a bowl until they’re well combined.
Ahead of sprinkling the sugary cinnamon mix over the dough and to add another dimension, as well as calories, you want to spread the room temperature butter all over your dough.
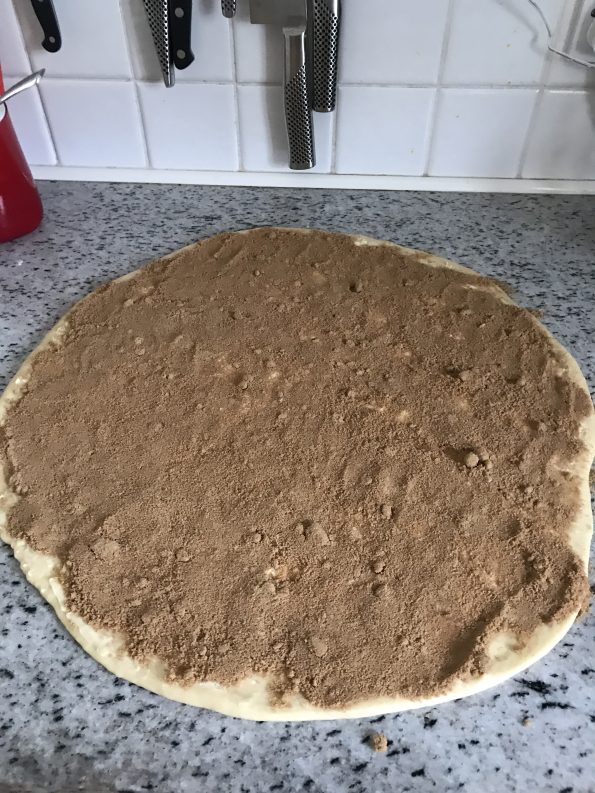
You can then sprinkle the cinnamon sugar on top of the butter, making sure you cover all of the dough, pressing down to make sure it is well stuck ahead of rolling.
Then begin the rolling process, starting from the 40cm side.
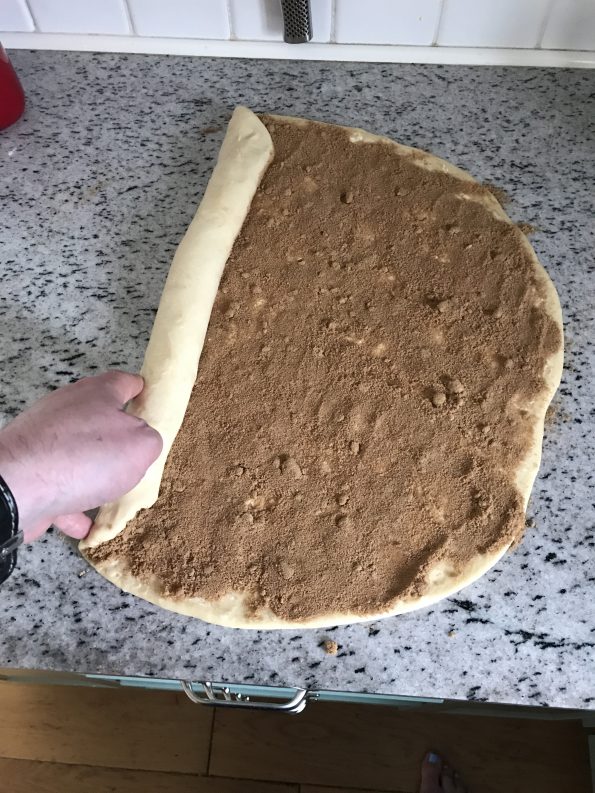
Once rolled into a long sausage, slice off the ends so you get a consistent shape that can be cut into 8 equal parts – around 5cm each.

For me, cutting crossways only yielded 7 individual rolls, so I used the ends as well to fill the cake tin, which worked out just fine as those parts got bigger and filled in the space. Next time I will roll the dough thinner to get more length to the sausage (sounds dodgy, sorry not meant to!).
Once you have the individual rolls, you can either cook them separately on baking parchment, allowing a little space between then for the prove and then the rise through cooking, or you can cook them all together as a flower for the beauty and the applause – this is what I did. Before you start, make sure the tin is well coated in butter to grease. Then, starting with the middle, add the rolls to the cake tin and then go clockwise around the middle bun.
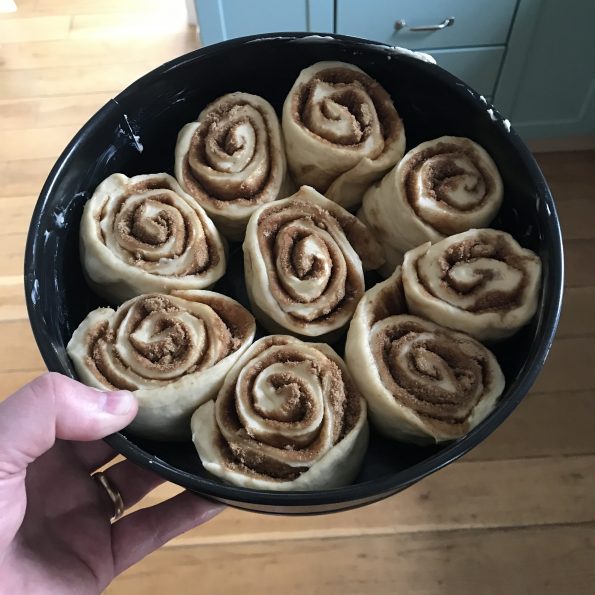
Once you’ve made the pretty dough picture, leave the tin on the side so it doubles in size and pushes up to get rid of any spaces between the individual buns. This step will take between 45-1 hour.
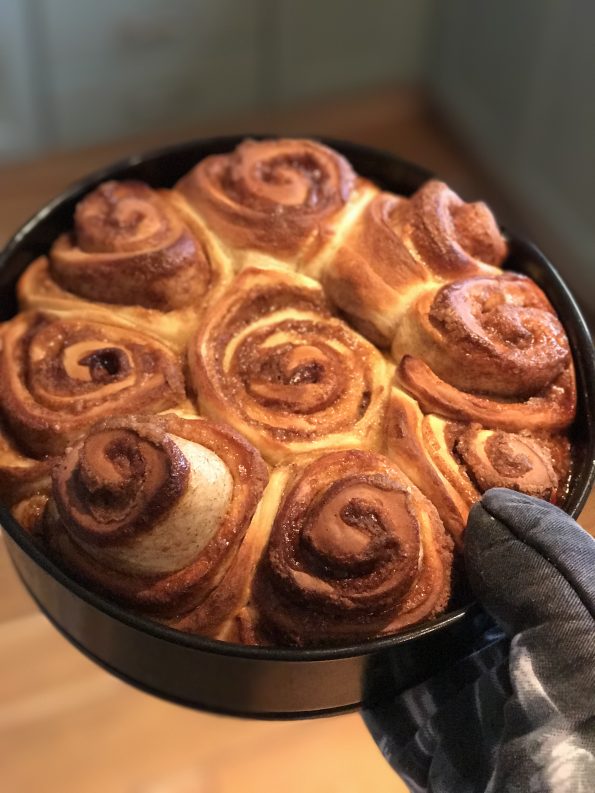
As the buns near peak rise, pre-heat the oven to 200C / 180C fan. Then brush the buns with beaten egg and bake for 15-20 minutes or until golden brown. The sugar should have melted and will be bubbling over with cinnamon goodness! Don’t rush to take them out of the oven too soon, otherwise the top and outside of the bun will be done, but it’ll be soggy at the bottom and the centre of the swirls. It is a tricky thing to call and I certainly didn’t get it right the first time. However, even if it doesn’t work first time, you learn something new.
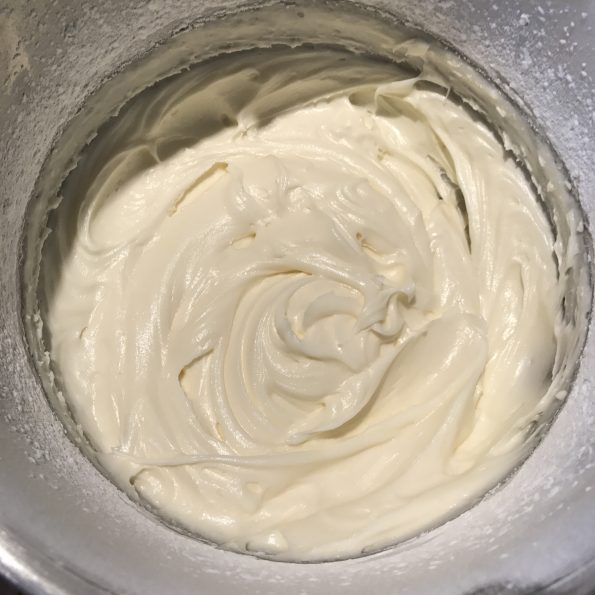
Now you could leave it there and it would be perfectly acceptable. However, the cream cheese icing takes it to the next level. So if you’re going further, add the cream cheese and room temperature butter first and blitz using either a hand whisk, or a stand whisk (which is what I did). You then add in the icing sugar on slow first until the icing has been incorporated in with the butter and cream cheese, then turn up the speed, otherwise you risk being lost in an icing sugar mist in the kitchen! Luckily my stand whisk has a cover, so I was able to turn up the speed from the get go. The finished mixture should look creamy and taste amazing…
You’re then able to smear the icing goodness all over the top of the buns, probably did too much this time, will learn for next time!
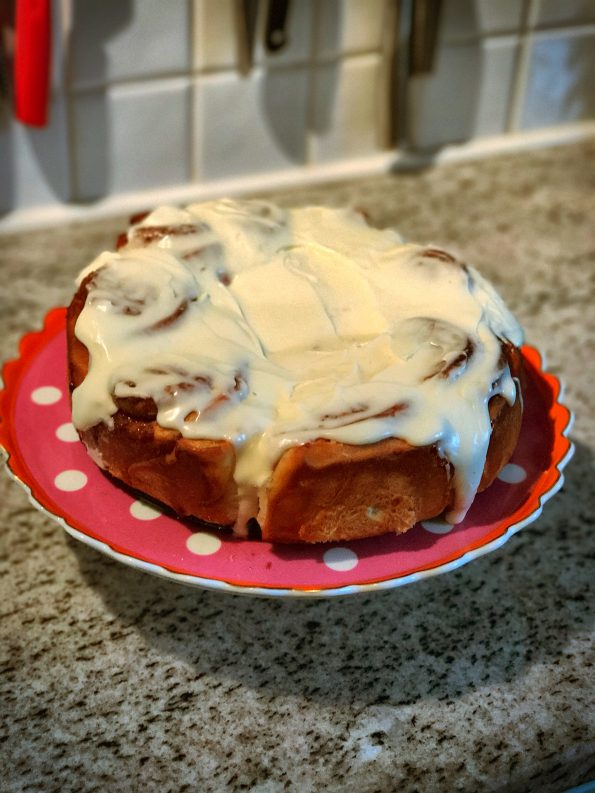
And remember what I said at the start? Everything tastes better with a black coffee.

A variation on the cinnamon is to use cardamom. Not tried this personally, but can see how the differing spice would work and will maybe give it a go soon. As always, let me know how you get on.
1 comment on “Cinnamon buns with cream cheese icing – tear and share!”Add yours →