We recently went down to my brother and sister-in-law’s cottage in Thorverton for the annual Easter egg hunt. As such, I wanted to take some things with us as treats for the children and the adults.
Michele, my sister-in-law had already asked for jaffa cakes, so I wanted to come up with something else, which was Easter themed. Sarah had heavily hinted at a recipe from Martha Collinson that was in the Waitrose magazine, but I had paid a lot of attention as I was thinking about another recipe. However, on closer inspection it was based on a firm childhood favourite, iced gems, and as soon as I realised that, it was a done deal. This recipe makes about 50 iced gems, though I made twice the amount as I had a hungry audience and didn’t want to run the risk of going down to Devon empty handed!
Ingredients
For the biscuits
- 75g butter, softened
- 50g caster sugar
- 1 tsp vanilla extract
- 25g cornflour
- 125g plain flour
- 2-3 tbsps of cold water should your mix be dry and crumbly
For the topping
- 125g royal icing sugar, per batch of icing – there’ll be some wastage but the end result is worth it!
- 50 Cadbury Mini Eggs
- Gel food colouring (optional, but creates a very decorative finish)
Method
- Pre-heat the oven to 190C and line 2 baking trays with baking paper, this is where your pre-cooked biscuits are going to go.
- Cream the butter, sugar and vanilla together until light and fluffy. Then sift in the cornflour and plain flour and gently mix until it forms a soft dough, adding a teaspoon of cold water at a time if the mixture is too crumbly (do it slowly so as not to get the dough too wet). Don’t worry, by adding water, it won’t dull the flavour of the biscuit. What you’re looking to avoid is the mixture cracking when you roll the mix out later.
- To form, squeeze the dough together with your hands and then wrap in cling film and chill in the fridge for about 15-20 minutes.
- Grab the dough from the fridge and then roll the dough out to about 5mm thickness, you don’t want it too thick as this is the base of your iced gem and you want it to be crispy, rather than stodgy.
- To cut the biscuits out, use a 2.5cm round cutter (I used an apple corer as didn’t have the right size. However, I’ve since bough a cutter from Lakeland, both use equally well). Pop each of the biscuits on the baking tray and bake for about 8-10 minutes until cooked, but not brown. The best biscuit should hold their shape, but be soft and light.
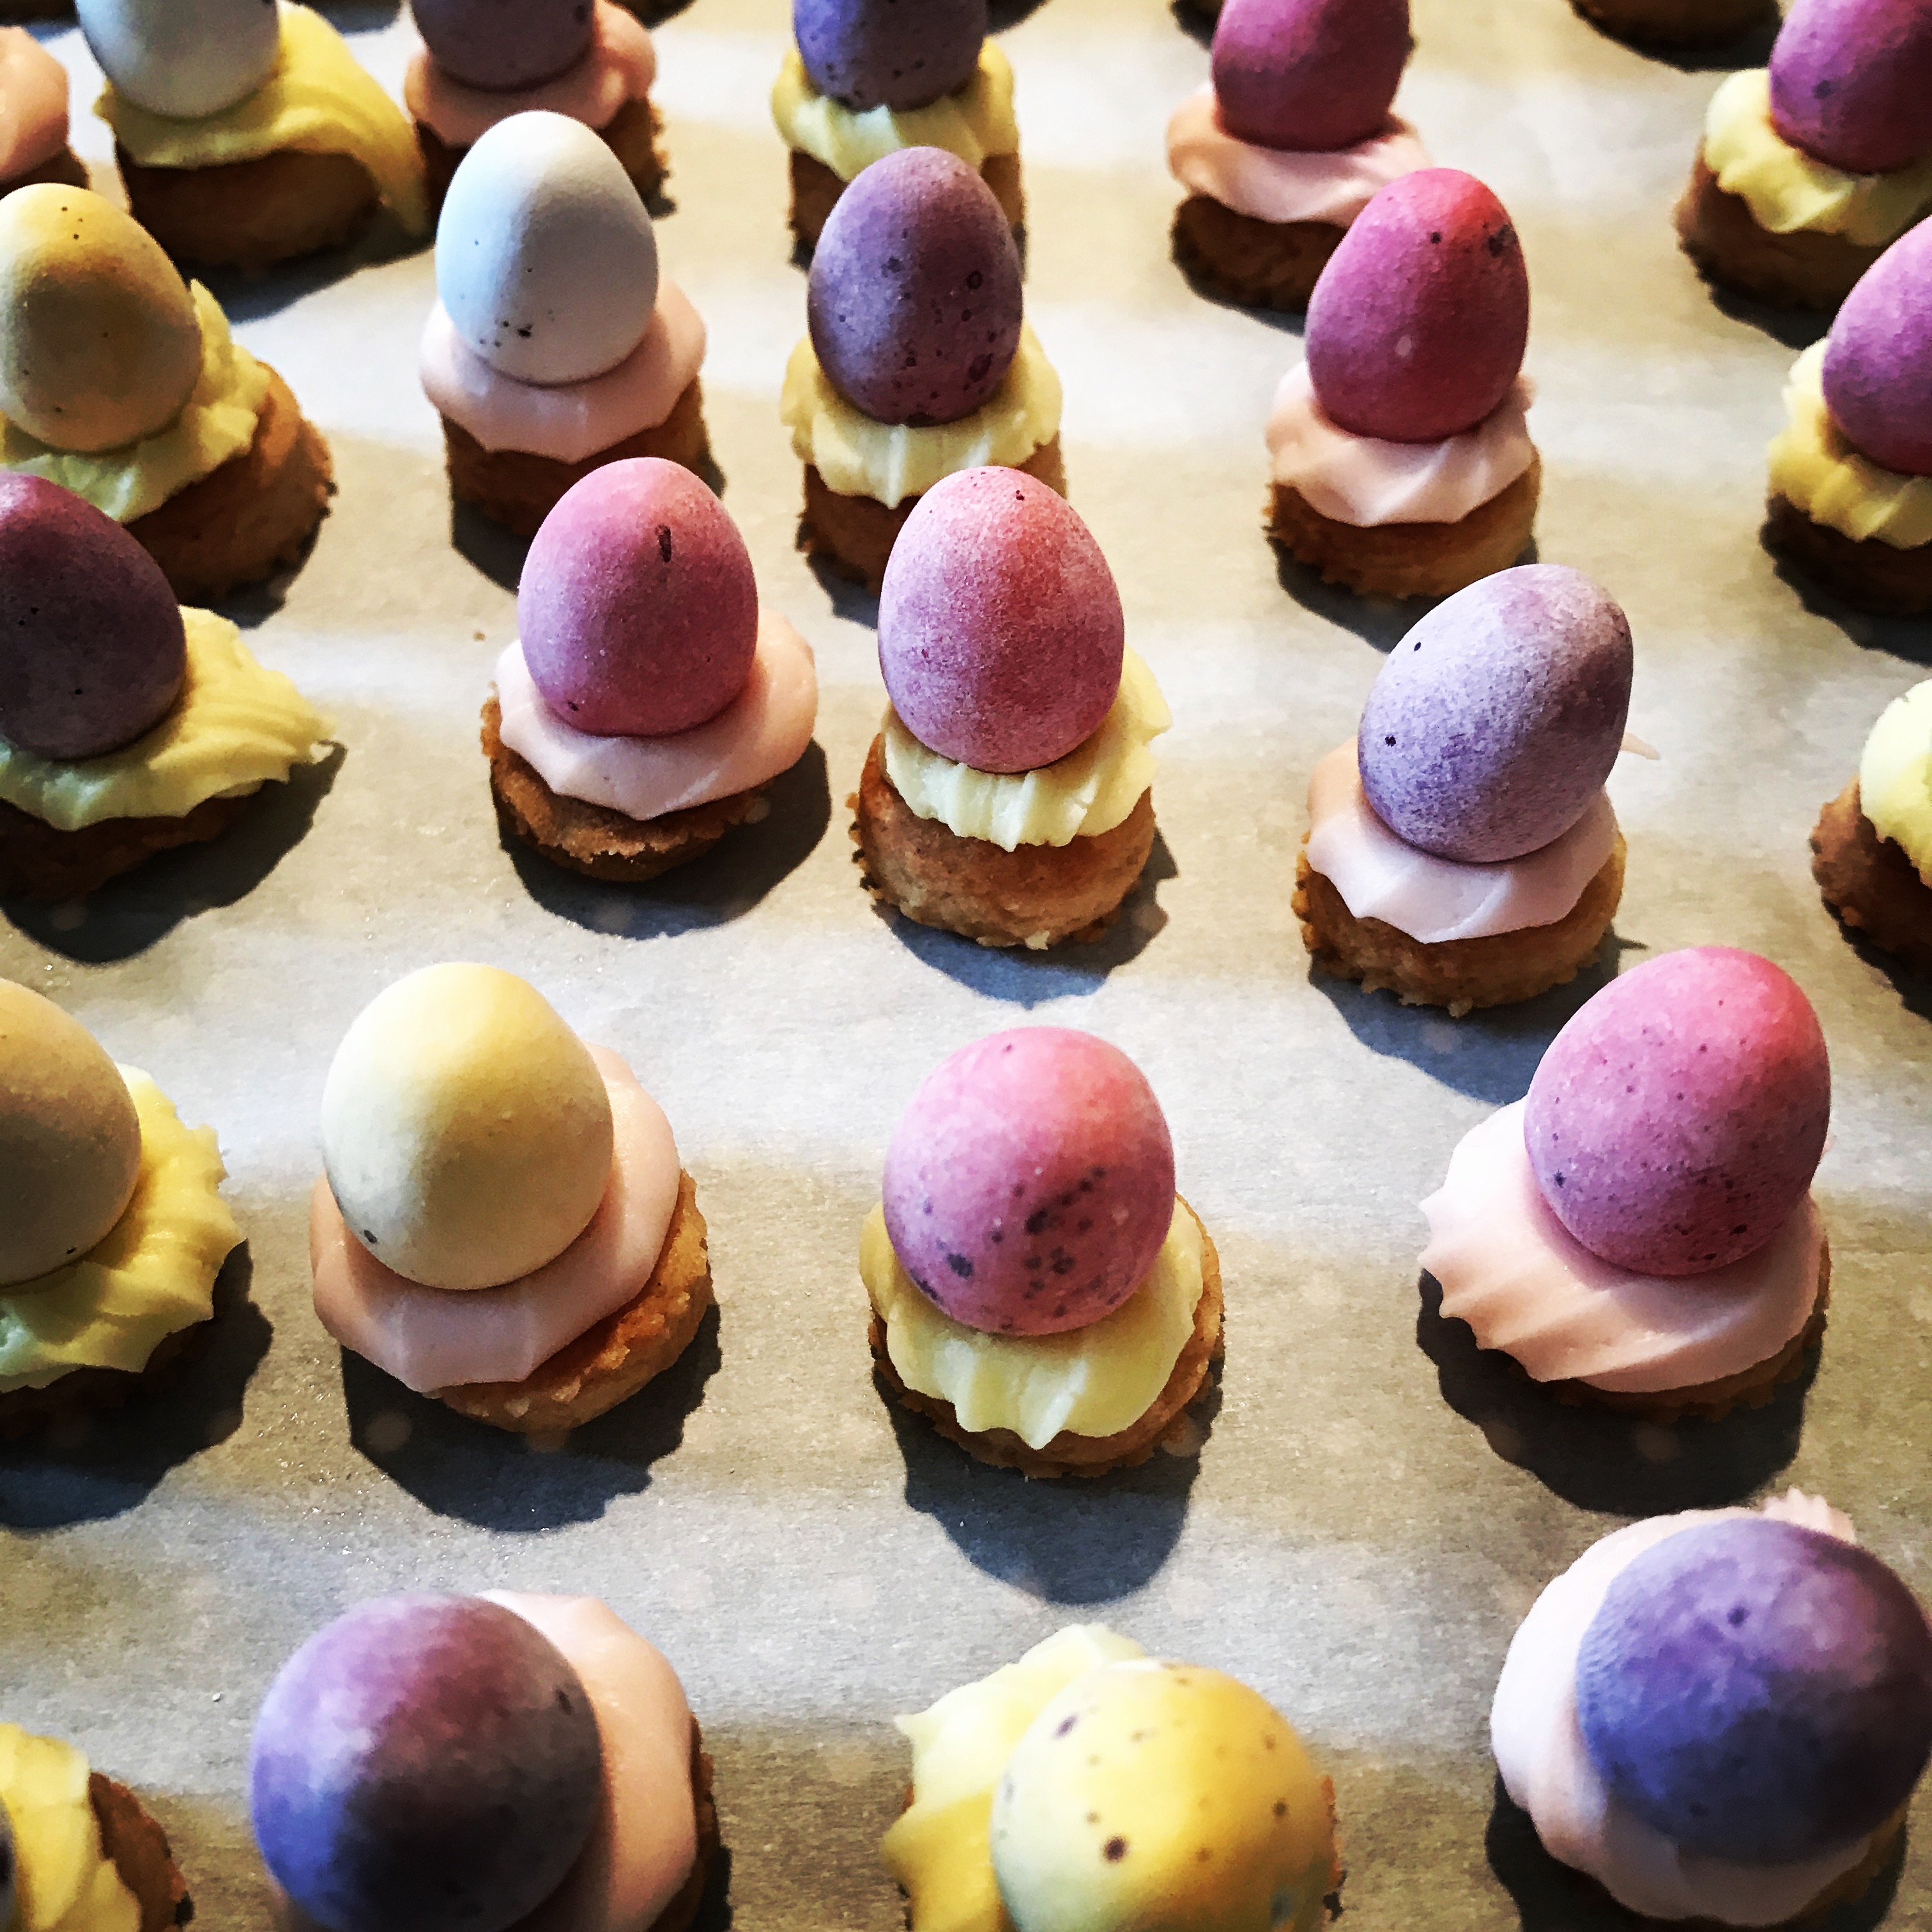
- While the biscuits are cooling, you want to make the swirly topping. Making it is pretty easy and for the best effect you want to make three colours, I made a pink, blue on top of the basic white. The colour you’re looking for is a pastel shade, cast your mind your mind back to childhood for pointers.
- So, for the icing, for each batch you want to use the same process – 125g of royal (or regal icing) broken up into bite size chunks into a bowl. I did white, blue and pink and for the colouring used 2-3 drops of colour paste per batch.
- To each batch of icing, add in a tablespoon of water to the icing sugar and using a sturdy electric hand whisk, whisk until stiff peaks form, around 7-8 minutes should do it. If the liquid becomes too wet, just add a little more of the royal icing, if it is too dry then add a little bit more water until just right. Don’t skimp on this step otherwise you won’t get the the classic swirl on the biscuit.
- When you have the icing ready, decant into a piping bag that has a small closed star nozzle and pipe icing onto each biscuit and top straight away with a Mini Egg. Try to have an equal number of colours as it makes for a great looking overall appearance to the bake.
- Once you’ve done them all, put aside somewhere a small member of the family (or a tall one) won’t find them to let the icing harden. If kept in an airtight container, they’ll keep for up to 2 weeks.
Please do let me know how you get on!


0 comments on “Easter iced gems – one is not enough!”Add yours →