For a Christmas present (thanks Mum) I was bought a voucher from Bread Ahead in Borough Market, London. It took me a while to make the time and also choose the class I was going to attend. In the end I chose something that I had no idea how to make – a doughnut – and something that I was relatively sure I had no chance of being able to make! Well it turns out I was wrong.
The recipe I actually got after the class from Googling, which you can find here. It comes from a talented duo – Justin Gellatly and Matt Jones. I met Justin briefly at the class, where he was dashing about to restock the market stall, an impressive character. The recipe and method introduced me to a few things, which I’d not really done or practiced before and rather copy and paste the recipe here, I wanted to point out the critical bits that after making these time after time have really resonated for me.
The donut
So the list of ingredients you need to get is as follows, which makes about 20 donuts. I normally double up the ingredients and make around 36.
- 500g strong white bread flour
- 60g caster sugar
- 10g fine sea salt
- 15g fresh yeast, crumbled (fresh, little packets from Sainsbury, or the Allinson stuff works well)
- 4 eggs
- Zest of ½ lemon
- 150g water
- 125g softened unsalted butter (cut into squares and added slowly)
The key to being able to handle the dough and form the fluffy donuts is preparing the mixture the night before you intend to serve the donuts.
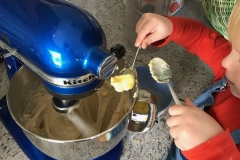
Making the dough for the donuts it is pretty easy to be honest, once you learn how. For me, I whack all the ingredients in the Kitchen Aid together, apart from the butter, and mix using the beater for about 6-8 minutes. Once the ingredients are well mixed, you want to add the butter in bitesize chunks and then give it a good mix for 5-6 minutes or so, until you get an elastic glossy dough. The lemon in particular is specific to this recipe and really pops in the finished article, I always smell the bowl before popping into the fridge, it gives you a bit of excitement of what’s coming the next day.
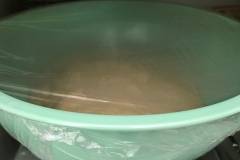
Cover the dough with a bit of cling film in the mixing bowl and leave it for an hour or so. This bit isn’t massively scientific timewise, but the dough should double in the bowl. If you leave it for 3-4 hours because you’re doing something out of the house, it also doesn’t matter. Once you’re able, just kneed the dough again for a minute to get the air out and bang into a fridge friendly container, covering with cling film. I use the dough hook on the KitchenAid. You need at least 12 hours in the fridge before doing the next stage, the cold mixture is much easier to roll into tight balls.
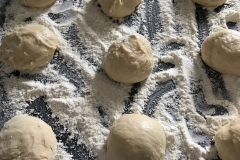
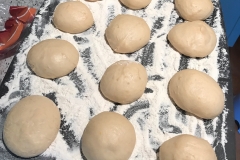
Once your dough has been languishing in the in fridge overnight, get it out and either onto a cold work surface, or if you don’t have a cold work surface a chopping board. This bit is fun and particularly good with children, though you want to try to be exacting about how much the dough you cut off weighs, as this will determine the size of the donuts. 50g is what the recipe says, but as long as it isn’t under it is okay. Before you begin, make sure you have a floured chopping board, so you can pop the balls on once you’ve created them. This part is especially important, as if you don’t do this, the balls have a tendency to stick to the surface, which is particularly upsetting when you’ve gone to all this effort!
To create the balls, you form your hand into a claw and move the dough round and round until you have a tight doughball which is smooth looking and without any blemishes. It takes a few attempts to get it right, but once you do, it is hard to forget. Once you’ve done them all, you want to leave them for 3-4 hours to rise into pillows of goodness. I’ve found that dusting them with a little bit of flour ahead of covering them with cling film helps the cling film not stick to the dough balls.
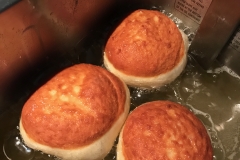
Once the time has passed and the balls have turned themselves into the raw doughnuts, you’re ready to cook them. Best way is to use a deep fat fryer with sunflower oil at 180C. Each donut needs to be done for 2 minutes on each side before removing to toss in some caster sugar. I use a mix of golden and white caster sugar for good effect and taste. Once you’ve done the first one, it is the Chef’s right to tear open the first one warm from the fryer and indulge in the sugary goodness.
You can stop at this point if you’re not a massive fan of fillings, or you can go on to fill them with creme pate, or jam. It is totally up to you.
Creme pate (called lots of things – Creme patissiere, Pastry cream, the filling of champions)
I have had a go at some many different types of creme pate, but my favourite recipe is here. Found, like most things, by Googling something I wanted to make, mainly because a previous recipe just didn’t work out and I figured there were various ways of doing the same thing. The thing that worked for me with this particular recipe is that it all comes together in the last minute of the cook, to be patient and never stop stirring!
Jam
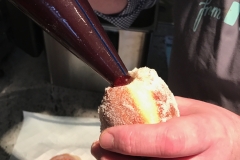
Plenty of people cook jam from scratch and I’ve no doubt that I could do the same, but the hero of the bake for me is the donut and after spending the time to create it, I want a quick and simple filling. So, my go to jams are either Hartley’s strawberry jam, or St Dalfour for the raspberry filling. Traditional is raspberry, but it works just as well with strawberry. The main thing here is to sieve the jam to remove the seeds and also make sure you invest in a good piping back to squeeze in the filling into the donuts. I have some thoughts on utensils, which I will create and add to over time.



Hey Batch from Scratch. And so to donut or doughnut! Love the blog! Here’s to many new gadgets, utensils, blogs and reviews!
Thanks Rebecca! Always have room for more tools and gadgets in the Batchelor household :o)
Brilliant first ‘flog’ Matt! A riveting read and very inspirational!
Very kind Emma, thank you.
We have never ever ever tasted a doughnut donut tasted so good! I am so pleased that we had them super fresh, not many people can say that .
Your international taste team is well impressed.
Thanks Eline, was great to have you stay and sample some of the goods first hand!
I can confirm that these doughnuts (yes, doughnuts, not donuts http://img.huffingtonpost.com/asset/scalefit_720_noupscale/5750510a120000250089529d.png) taste as good as they look
Ha, brilliant. Thanks Ed, I can sleep easier knowing that now.
loved the recipe. congrats
Thanks Kitty.
recognized somebody’s little hands kkkk
Great blog and good walk through. Will be trying this soon!
Thanks Christian. High praise, coming from you!
Very nice work, Dad ?
Thanks Joe.