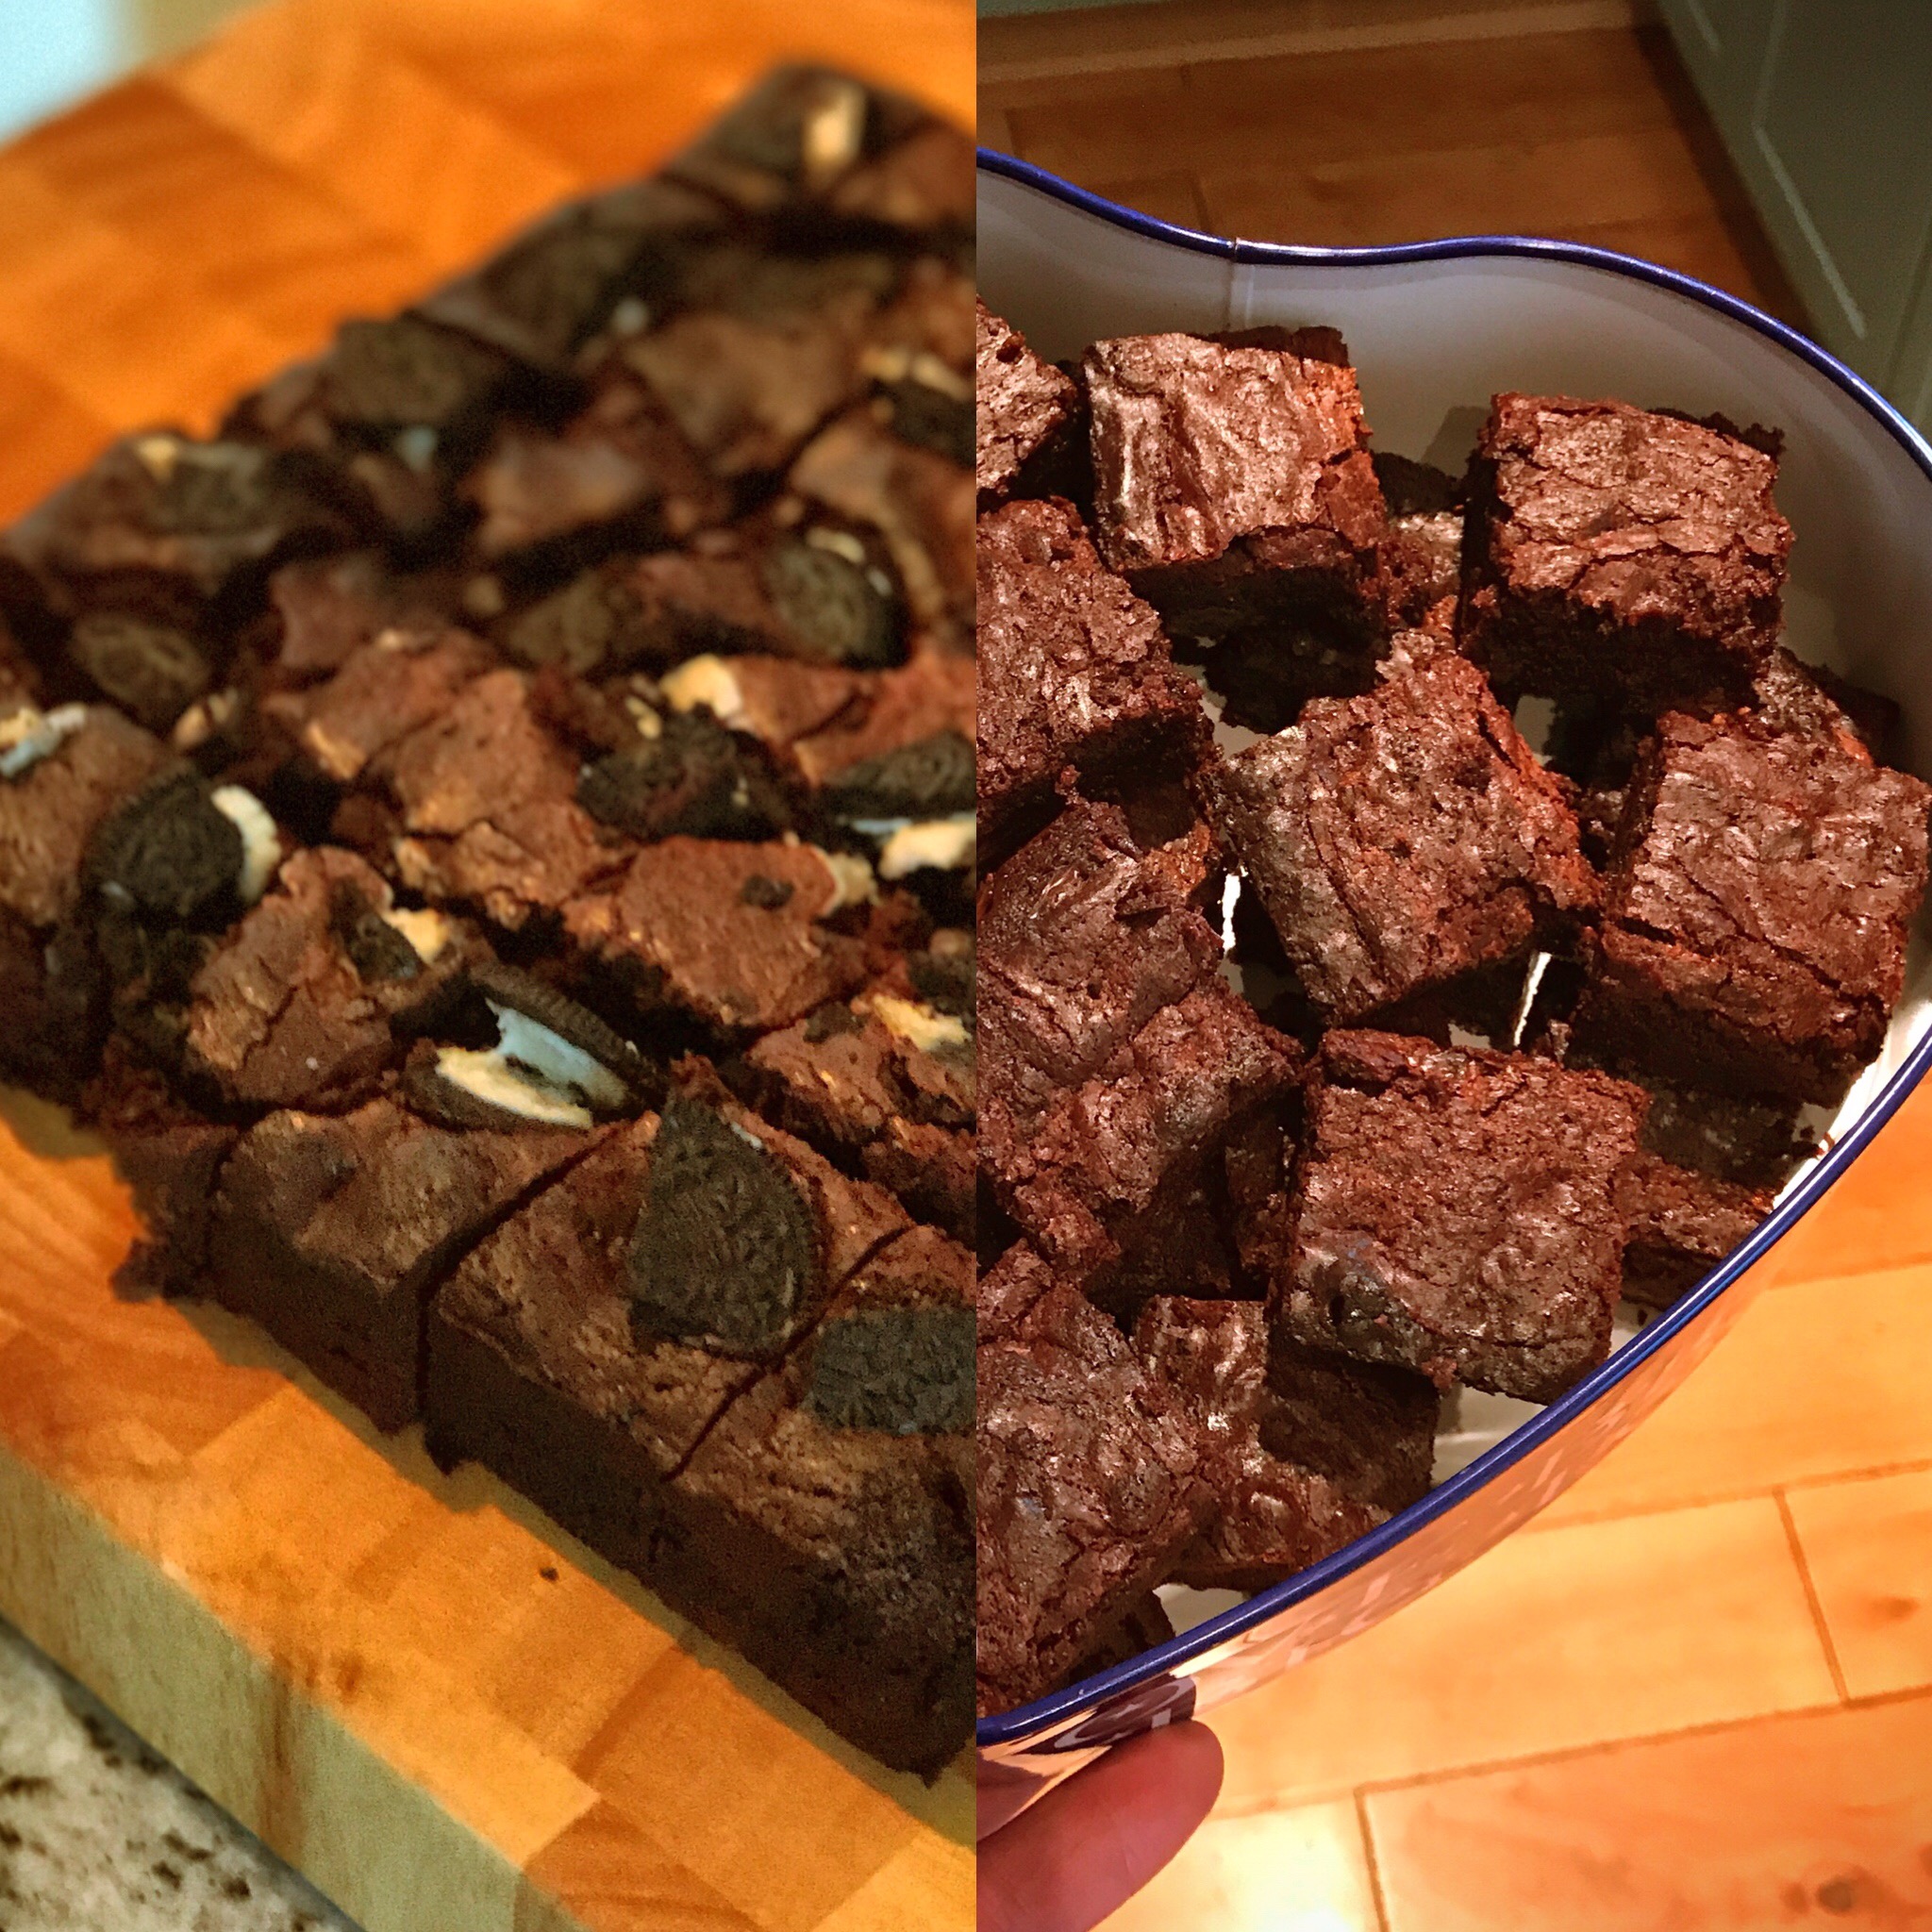
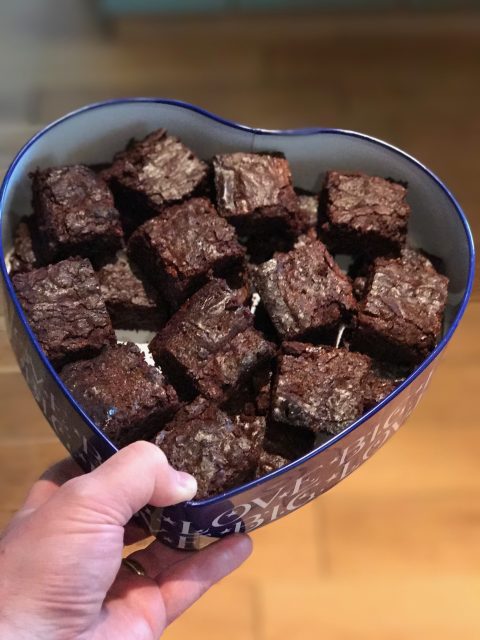
As with many of these recipes, something I’ve never really tried until recently is making a brownie, mainly because it isn’t something I enjoy eating. However, given this was a request from some of the ladies at Sarah’s work, I thought I would give it a go. It also turns out that they aren’t half bad, oh and by the way they are full of lots of calories so how can they be bad?!
Given I had a couple of hours to myself, as Sarah and Angus were out, I thought I would try two different recipes from Chef’s that resonate with my style of cooking – Martha Collinson and Lorraine Pascale. After making the brownies, I think this was the right thing to do, as doubling up ingredients to make more would have caused the air to be squashed from the mix and made for stodgy brownies. Approaching it in this way has also resulted me having a deeper understanding of brownies and the different techniques between recipes.
So, in the order I baked them, here are the recipes and results, I would love to know which you prefer.
My Favourite Brownie – Martha Collinson
Ingredients (makes about 24 squares, dependent on how generous you are!)
- 150g light brown sugar (I used light muscavado)
- 225g caster sugar (as always, I used a mix of golden and white for a bit of deeper flavour)
- 225g butter
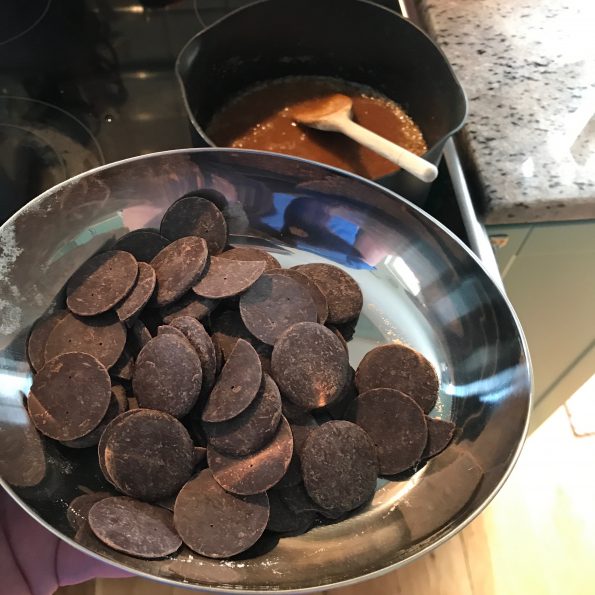
- 150g dark chocolate, chopped (makes it easier to melt into the sugar and butter mix)
- 3 eggs
- 115g plain flour
- 75g cocoa powder
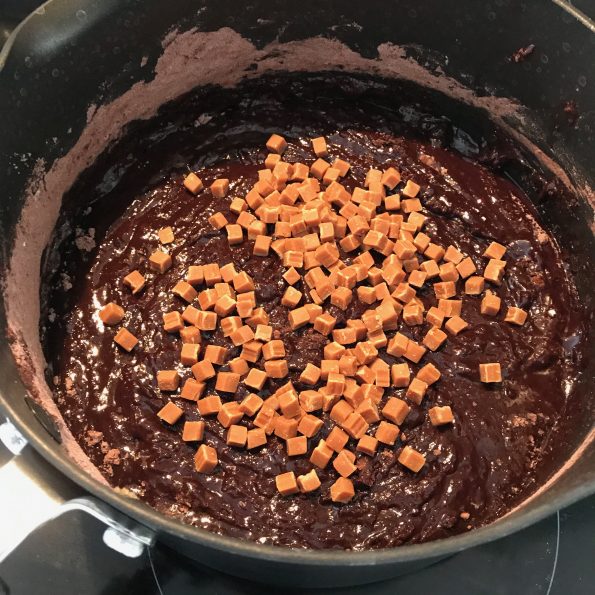
- 150g chocolate chips – you can add other things to the mix as required, I added fudge chunks
Tray required – 20 x 30cm brownie tin
Method
Preheat the oven to 200C/180C fan and line a 20 x 30cm tin with baking parchment. From Lorraine Pascale I also learnt that if you butter your tin before you put the paper in, it will help the paper stick and not move around when you add the mix.
Add the sugar and butter into a large saucepan and heat on a medium heat until the butter has melted.

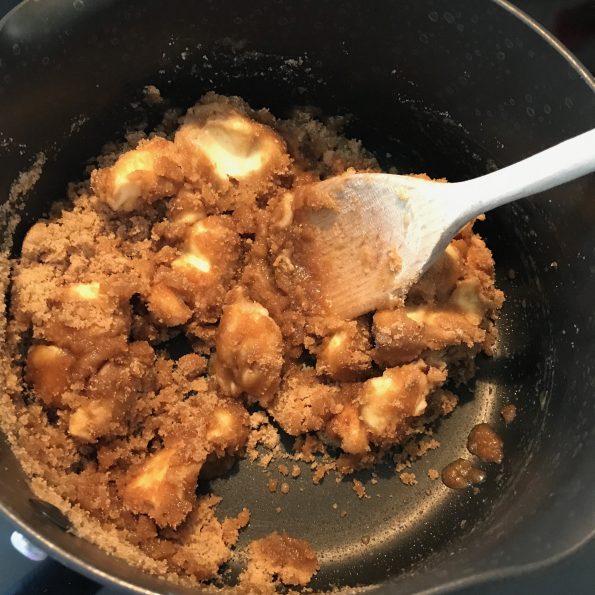
Once the butter has melted, you then want to simmer for 5 or so minutes until the sugar melts and for it to lose its grainy texture. A learning for me, is if I do these brownies again I would let the butter melt first and then add the sugar. It would make it easier for the sugars to dissolve into the butter, without over simmering the butter and sugar mix.
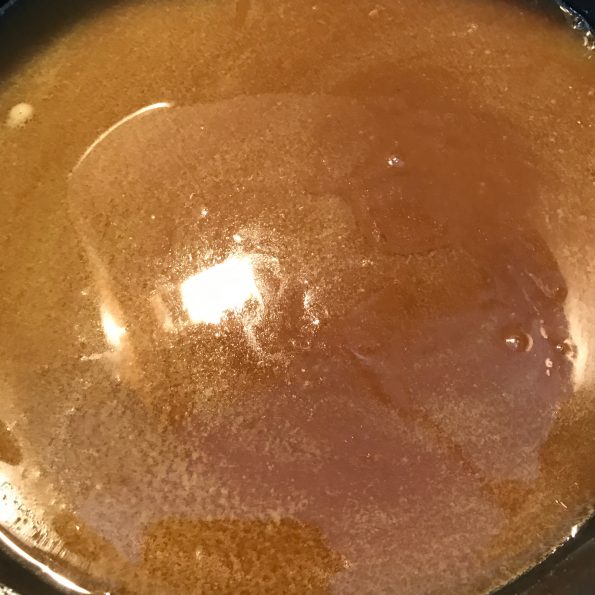
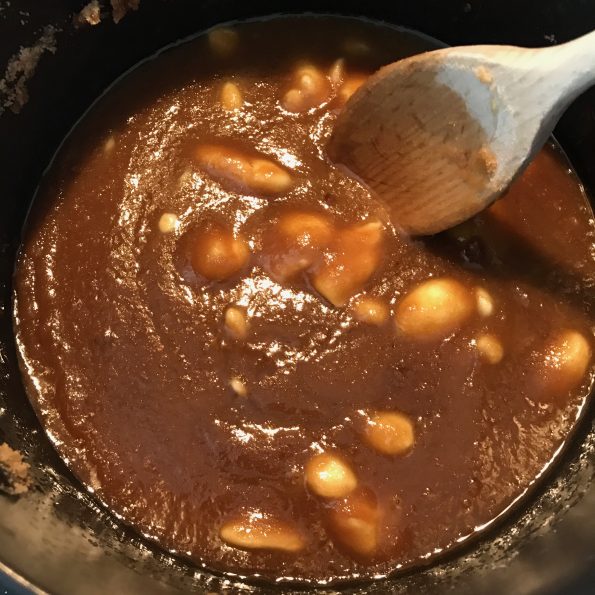
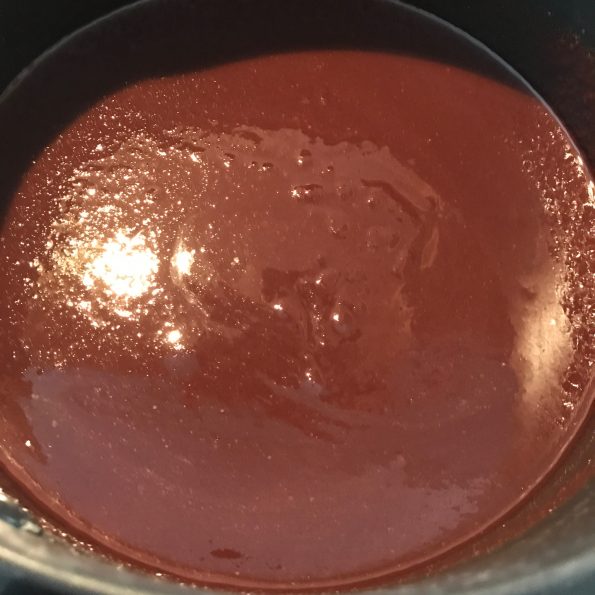
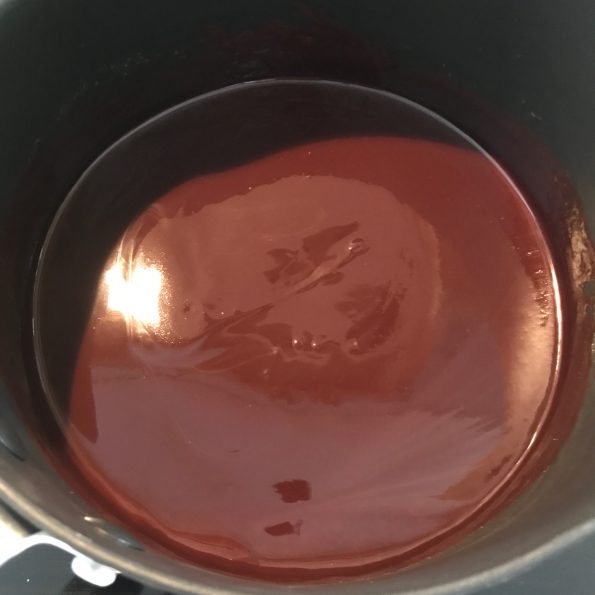
Remove the pan from the heat and add the dark chocolate to the warm sugar and butter mix. Stir in until the chocolate is completely melted (I used the Montezuma’s dark chocolate that Sarah bought me as a gift, which is perfect as it is very thin and quick to melt). Leave to cool at room temperature.
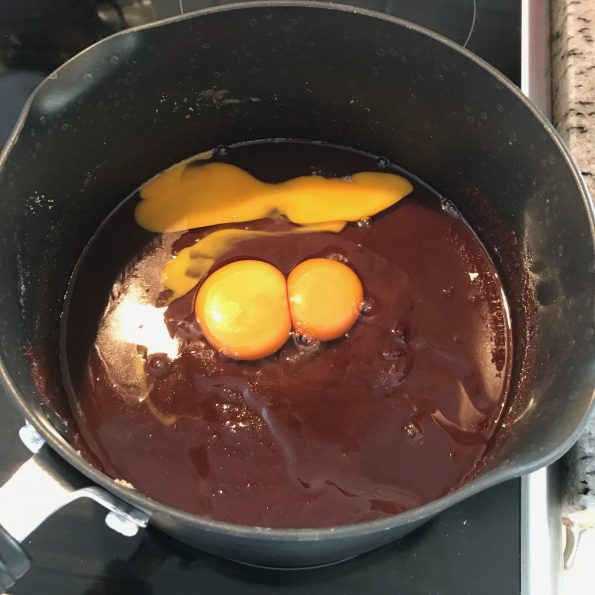
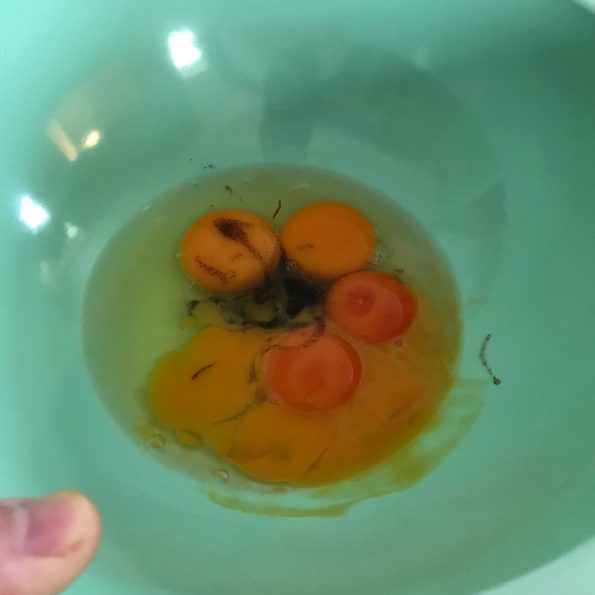
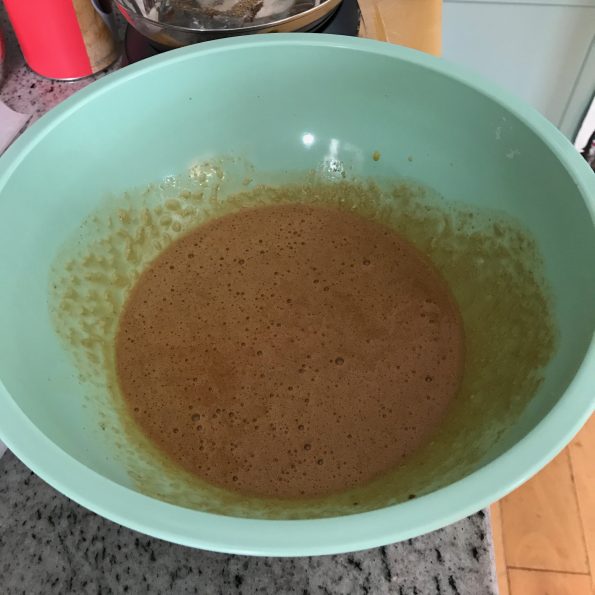
Once the mixture is is cool enough to be able to touch without a trip to A&E, beat in the eggs. You don’t want to rush adding the eggs, otherwise you’ll have a chocolaty omelette, which is not what we’re going for here! You want to beat the eggs enough to get some good lift from them, this is what makes the brownies fluffy and not like a chocolate cake.
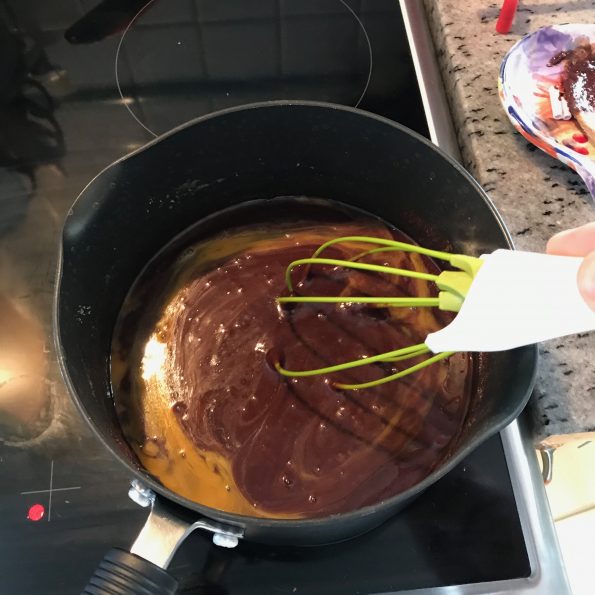
Add the flour and cocoa powder to the mixture, but be careful not to over stir. To aid this process, I combined the flour and cocoa before adding, which was one less thing to combine. You’re looking for a gooey mixture, but one that still has bubbles from the eggs containing the all important air.
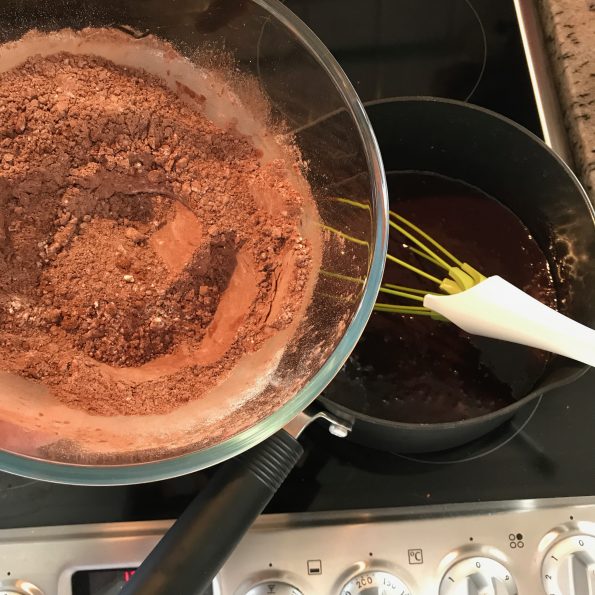
Fold through the chocolate chips (best using a rubber spatula) and scrape gently into the prepared tin.
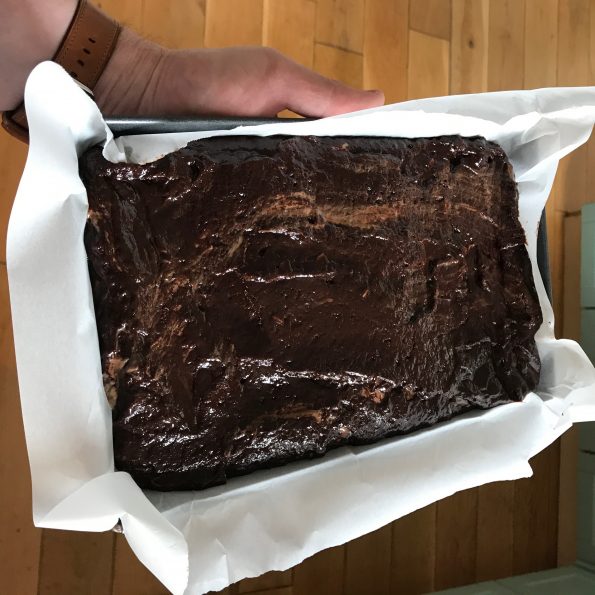
Bake for about 20-25 minutes, or until the top is shiny and slightly cracked. It will feel slightly underbaked, but for gooey and sticky brownies this is perfect.
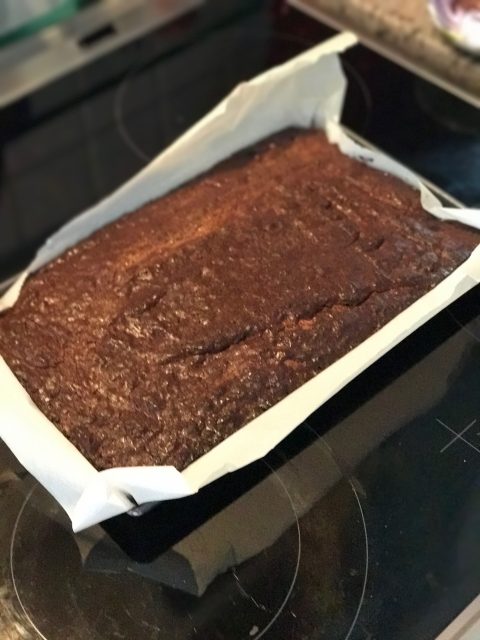
Leave to cool completely in the tin and then chill in the fridge for about an hour. The end result will be a brownie with a lovely fudgy centre. Cut into squares to serve!
Cookies & Cream Fudge Brownies – Lorraine Pascale
Ingredients (makes about 16)
- 165g butter, plus a little extra for greasing
- 200g dark chocolate, grated or finely chopped
- 3 eggs
- 2 egg yolks (makes a very rich brownie)
- Seeds of 1 vanilla pod, 2tsp vanilla extract, or 1 tsp of vanilla bean paste
- 2 tbsp plain flour
- 1 tbsp cocoa powder
- Pinch of salt
- 154g pack or Oreo biscuits, broken into quarters
- Icing sugar, for dusting
Tray required – 20cm square baking tin
Method
As was the case in the previous recipe, you want the oven pre-heated to 180C, however this time Lorraine specifies the middle shelf in her recipe. Thinking about it I see why the middle shelf is suggested, as some of the Oreos are left outside of the mixture. Being on the middle shelf means those Oreos don’t burn.
Grease the baking tray, then line with baking paper overlapping the sides a little. As I mentioned above, this is a great tip for general baking with a baking tray and baking parchment, as the paper sticks to the tray and makes for an even bake and cleaner finish.
Melt the butter in a pan over a medium heat and when the butter has melted, remove the pan from the heat and add the grated chocolate. As with the previous recipe, I used the dark chocolate Montezuma’s chocolate discs, which are thin and melt very quickly. You want to add the chocolate as quickly as possible, to maximise on the heat of the butter, otherwise you run the risk of not having the chocolate melt fully before the heat is lost.


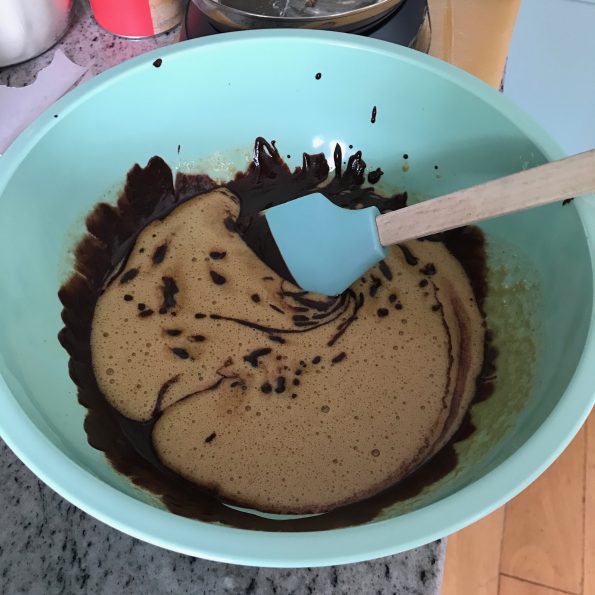
In a separate bowl, whisk the eggs, egg yolks and vanilla together in a large bowl until they begin to get light and fluffy (3-4 minutes with a good old fashioned metal handwhisk should do it).

You then want to add the sugar gradually, adding it around the side of the whisked eggs, so as not to knock the air that has been whisked in. Keep whisking the mixture until it becomes stiffer.
Once the egg mixture is ready, pour the chocolate into it, again pour around the sides so as not to flatten the bubbles containing air.
Then add the flour, cocoa powder and a third of the broken Oreos and stir until fully mixed together.
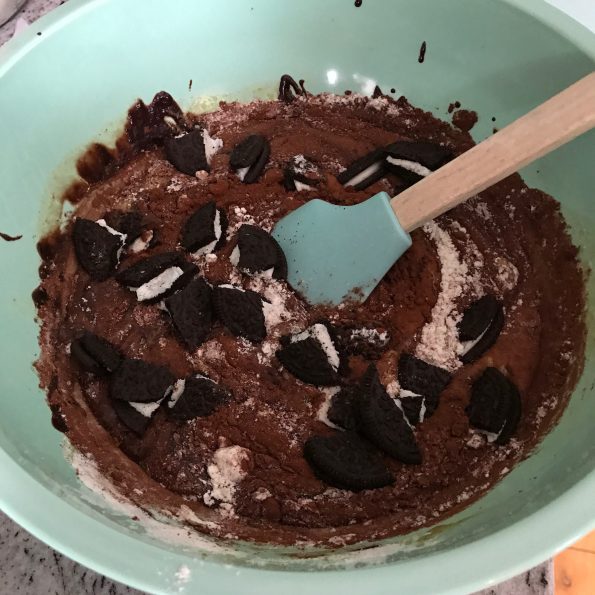

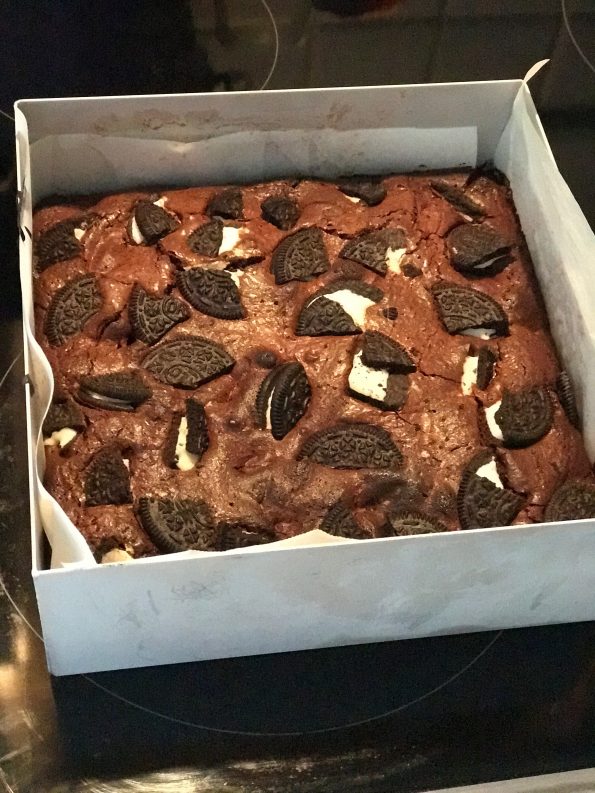
Once ready, pour the chocolaty gooey loveliness into the waiting baking tin. Scatter the remaining Oreos over the top and press them in slightly.

Bake in the oven for 25-30 minutes and take the brownies out once the middle is ever-so-slightly gooey.
Then, leave the brownies to cool in the tin ahead of cutting into delectably divine squares of chocolate goodness!
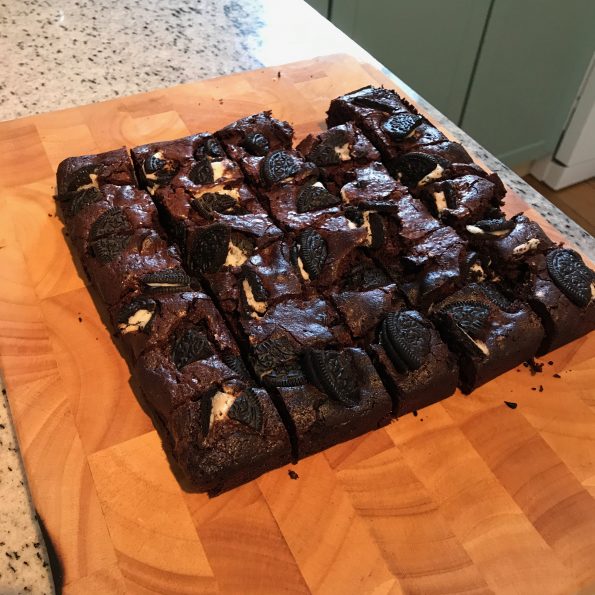
Thanks for reading and I’d love to hear which one is your favourite. For me, I think Martha’s recipe pipped Lorraine’s at the post, mainly due to simplicity of the recipe and the flavours coming to life in the finished bake.
Wow, Wonderful post. I like your style. I’m a vegan myself. If you happen to live in Australia you should definitely try some of these vegan dark chocolates. Here’s a link https://www.nestar.com.au/collections/vegan-chocolate/products/dark-hazelnut-130g?variant=27853611333 THey have some tasty products that I’m enjoying. Give it a try sometime and keep posting awesome posts like this!